Thursday, March 3, 2011

Orange Cream Cheese Muffins with Pepita Crunch


Fourth recipe in the eat me, delicious tribute week!

I was immediately drawn to this recipe. Cheesecake? Always. Citrus? Intravenously, please. Seeds? Welcome anytime. Delicious baked goods? Definitely. Suffice to say, these are really good muffins. They're not health food by any stretch of the imagination and I think they taste rather cakey (but my brother didn't think so), but still so delicious. I assumed they would taste more like cake and less like muffins because of the really time-consuming and labor intensive mixing (secret to excellent soft cakes and cheesecake, by the way) and that the directions stipulated you needed to add the ingredients little by little (other secret of really delicious sweet good baking). Generally, muffins are less mixed which makes them more crumbly.

I didn't think the cream cheese flavor was that prominent, but Ashley did, so you should try them for yourself and tell me what you think.


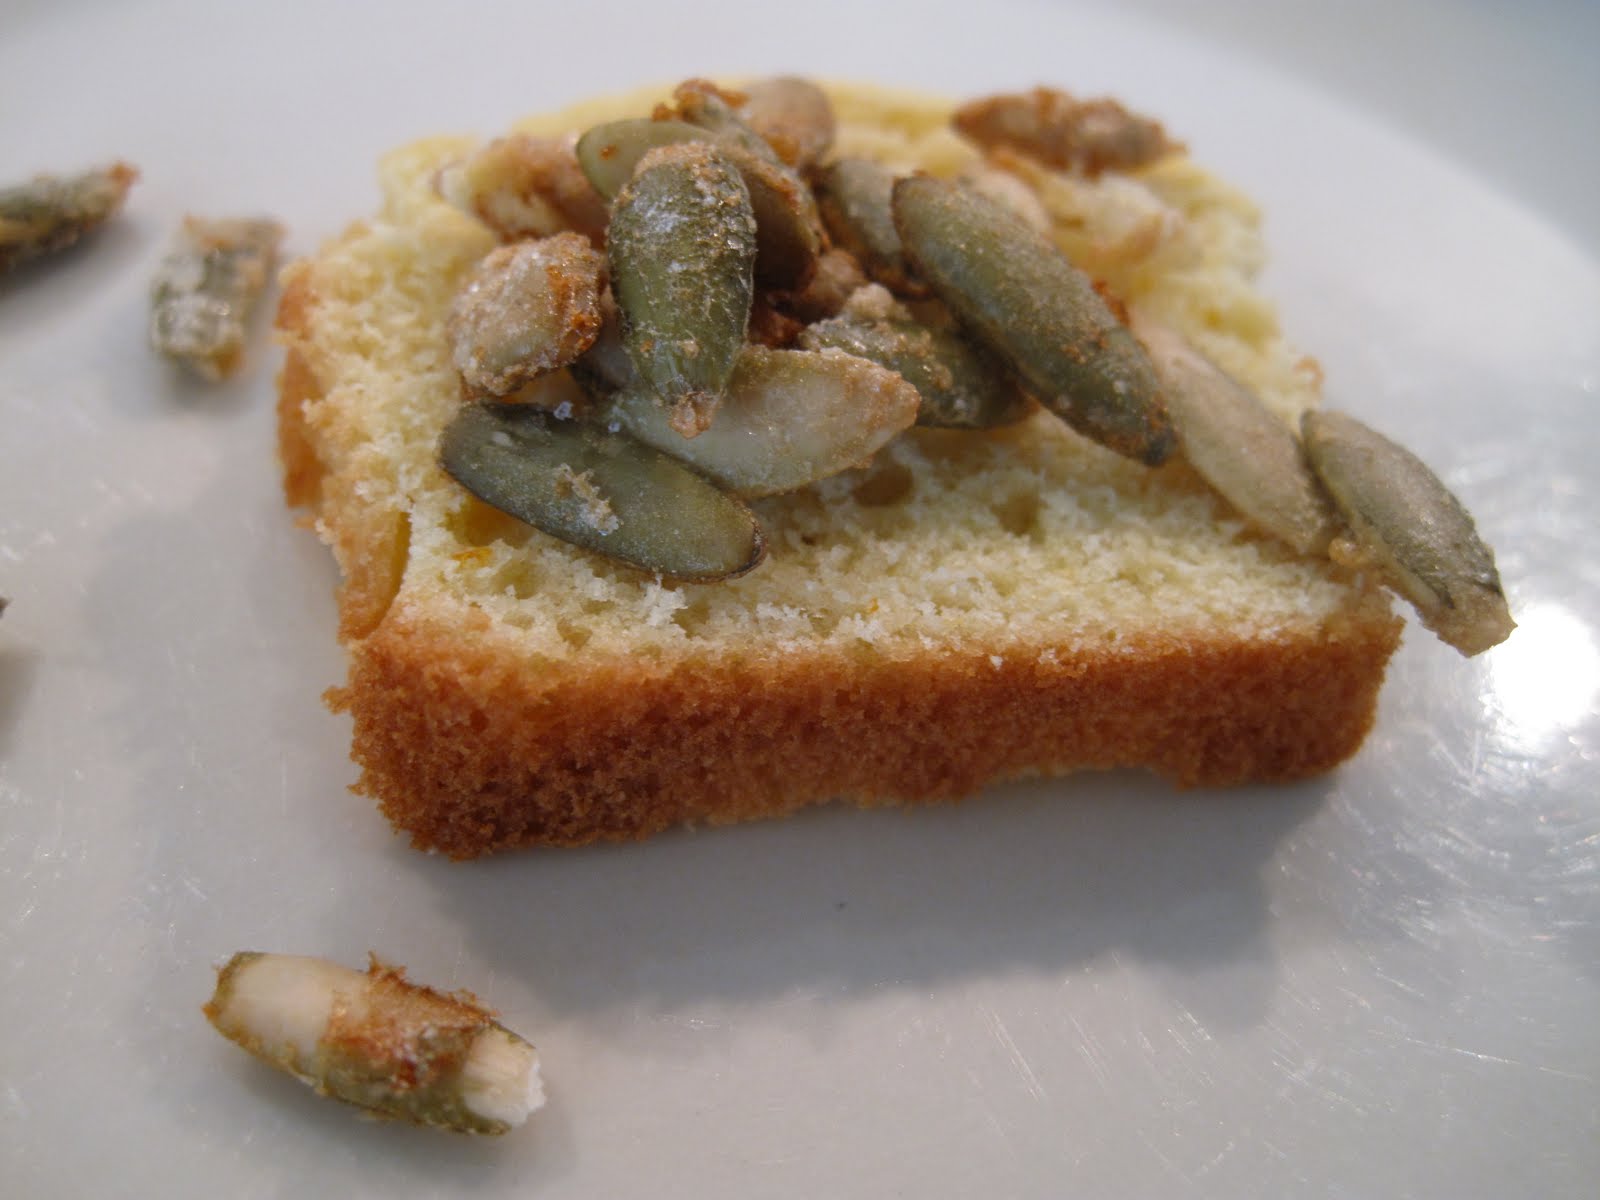
That being said, I really enjoyed these muffins. The pepita crunch was a welcome texture, and I especially liked sprinkling the leftovers on slices of the muffins (yum!)

My only frustration with the recipe was trying to scrape the pepita crunch off of the baking sheet. I didn't grease the pan at all, so this should be completely unsurprising (are you nonplussed?), but I also thought that there was a lot of leftover egg white which concerned me when I opened up the oven and it looked like I was making seedy scrambled eggs. Maybe one egg white to 1/4 cup of pepitas is not the right ratio? I don't know, but the seeds ended up tasting really good and not so eggy and after some enthusiastic scrubbing my cookie sheet is clean too.

Oh, and there was that part where I clumsily hit the muffin tin against the middle baking rack and two of my muffins toppled face-down onto the oven door. I just about cried, but luckily my mom was there to help me pick up the two I lost and encourage me to continue (thanks mom!).


Definitely try this one out if you're in a dessert muffin mood.


Makes 12 muffins

Found on eat me, delicious

Orange Cream Cheese Muffins (with Pepita Crunch)
Great Coffee Cakes, Sticky Buns, Muffins & More


Pepita Crunch
1 large egg white (reserve yolk)
2 tbsp plus 1 tsp granulated sugar
1/2 cup pepitas (pumpkin seeds)

Muffins
1/2 small navel orange, cut into 6 to 8 pieces (zest, pith and flesh)
4 ounces cream cheese, at room temperature, broken into 3 to 4 pieces
2 cups all purpose flour, spooned in and leveled
1/2 tsp baking powder
1/4 tsp baking soda
1/2 cup (1 stick) unsalted butter, slightly firm
1 cup superfine sugar
2 large eggs
1 large egg yolk (reserved from pepita crunch)
1 tsp pure vanilla extract

1. Position the racks in the upper and lower thirds of the oven. Heat the oven to 350F. Spray a rimmed cookie sheet with nonstick cooking spray.

Make the pepita crunch:
2. In a small bowl, whisk together the egg white and 1 tablespoon of the granulated sugar. Add the pumpkin seeds, tossing to coat well with the egg/sugar mixture. Pour into the prepared cookie sheet and spread evenly in a single layer. Sprinkle 1 more tablespoon of the sugar over the pepitas. Bake for 7 to 8 minutes, stir the pepitas with a fork, and bake for another 7 minutes. Remove from the oven, stir the pepitas, sprinkle with the remaining 1 teaspoon of sugar, and bake for another 3 minutes. Remove from the oven and allow to cool. Break up any clusters with your fingertips and set aside. (Ashley note: I found this baking time too long.)

Make the batter:
3. Increase the oven temperature to 375F. Line fourteen muffin cups with paper or foil cupcake liners.

4. Fit a food processor with the steel blade. With the machine on, drop the orange pieces through the feeder tube. Process until finely chopped, then measure 1/4 cup pulp and return it to the processor bowl. (Discard any remaining orange.) Add the cream cheese and process in three 10-second intervals, scraping down the side of the bowl after each process. The mixture should retain some orange texture.

5. In a large bowl, thoroughly whisk together the flour, baking powder, salt and baking soda. Set aside.

6. Cut the butter into 1-inch pieces and place in the bowl of an electric mixer fitted with the paddle attachment. Mix on medium speed until smooth and lightened in color, about 1 minute. Stop the machine and add the cream cheese/orange mixture, then mix on medium speed for 1 minute. Add the superfine sugar in a steady stream, then blend in the eggs, the reserved yolk, and the vanilla.

7. Reduce the mixer speed to low and add the flour mixture in three additions, mixing just until blended after each addition.

Bake the muffins:
8. Portion level scoops of the batter into the prepared pans using a no. 16 ice cream scoop (1/4 cup capacity). Sprinkle the top of each muffin with 1 tablespoon of the pepita crunch. Be sure to use any sugar the remains in the pan.

9. Bake for 22 to 25 minutes, or until the muffins are golden brown and the tops are springy to the touch. To ensure even baking, toward the end of baking time, rotate the pans top to bottom and front to back. Remove from the oven and place on a rack to cool.

Wednesday, March 2, 2011

Coconut Oatmeal Cookies


Happy Hinamatsuri (a.k.a Girls' Day)! When I was a little girl growing up in Hawaii, we celebrated girl's day every year. Although I said this week would be eat me, delicious tribute week, I really wanted to make hishimochi. So my dad and I set out on a mission, we drove to three different stores but none of them carried glutinous rice flour. I guess we're the last gluten-loving people on the planet. Oh well, next year! I'll keep my eyes peeled, though, because I'd love to figure out how to make red bean stuffed mochi and mochi ice cream. Maybe I'll try somewhere like Ranch 99 next chance I get. Any other suggestions? Where would you all get glutinous rice flour from?

I needed to make something delicious to celebrate those double x chromosomes and my new favorite food blog, so I set to search and found a coconut cookie recipe. Given that I spent my early childhood in Hawaii eating mostly tofu, fruits, and vegetables (okay, and spam musubi and manapua, too), I love almost all things fruit, coconut especially. I had never baked with coconut before, and wasn't quite sure what to expect, but it is undoubtedly of my new favorite baking ingredients. I used the thicker unsweetened coconut (so good!) and organic oatmeal (mmmm!) and ended up with incredible cookies, but they were certainly a mouthful because of the large hunks of coconut. I didn't add the chocolate, and decided to make them more soft and chewy than crunchy, which I think is a personal preference. They were gone less than twelve hours later!

I received this phone call around 4:30: "Hey Erin, I just got home and I ate about three of your cookies in thirty seconds. I hope you don't mind, I was calling to make sure you wouldn't be upset if they were all gone by the time you got back. Your cookies are amazing, sweetie. Love you lots."

I was overjoyed. That was totally the purpose of making them.

May your baking adventures be as fruitful as mine (bad pun intended)!

Makes about 29 medium sized cookies
Coconut Cookies
adapted from: eat me, delicious, Barbara Boczany & This Week for Dinner

1 cup (2 sticks) unsalted butter
1 cup brown sugar, packed
6 tbsp sugar
2 large eggs
1 1/2 tsp vanilla
1/2 tsp salt
1/2 tsp baking soda
1 cup flour
2 1/4 cups oats
1 1/2 cups dried unsweetened shredded coconut*

Preheat oven to 375F. Beat butter and sugars at high speed until fluffy. Add eggs and beat till blended. Beat in vanilla, baking soda, and salt. Add flour and mix at low speed until blended. Stir in oats, coconut and chocolate.

Arrange 1/4 cup mounds about 3 inches apart on large buttered baking sheets. Pat down to 1/2 inch. Bake on middle rack, 10 minutes (note: my rickety old oven is really inefficient, your baking time should probably be around 8 minutes). Cool one minute. Transfer to cooling rack.

*I made these with 1 heaping cup of unsweetened shredded and 1 cup of flaked coconut, and used ener-g egg replacer and earth balance to make it vegan. less nutritional value/ more ethical. i used semisweet chocolate chips on the last batch of cookies. Makes about 36.

Tuesday, March 1, 2011

Soft, Lovely Pretzels


Before finals kick in, I decided to make this week a tribute to my new favorite food blog, eat me, delicious (sorry if you are getting sick of hearing me dote, but the food Ashley blogs about is so good!). So I suppose this will be the second recipe for my eat me, delicious tribute week, and we'll count the first one as yesterday's introduction to the goodness of white chocolate.

Back to bendy food: pretzels are one of those breads that I really enjoy but rarely eat. California just isn't chock-full of pretzel vendors, unfortunately. I wrote in my first post that part of the reason I enjoy baking is to make other people happy. My dad had been asking me to make pretzels for a while, so I finally caved after I found scrumptious looking pretzels on Ashley's blog. They're surprisingly easy to make, too! My dad, Profe, and our dog, Elric, all flocked to the baking party, and Profe tried to steal a piece of my pretzel, the scoundrel! But don't worry, only dads were fed. :)

Ashley got the recipe from Alton Brown. A while ago, my best friend had mentioned that one of her favorite shows was "Good Eats" but I had never really watched Alton's cooking show (or any cooking show for that matter) or had any inkling about his culinary craftsmanship before today. I've been missing out. Check out his delicious looking enchilada lasagna. That's definitely on my ever-growing list of things to make.

Speaking of making things, these pretzels are fun, easy, and a deliciously comforting food. The baking powder in the boiling water created a huge mess, but the fun of making this recipe was totally worth it (and now my stove is really clean too!).

Enjoy!


Soft Pretzels
Found on eat me, delicious who got the recipe from Alton Brown

Makes 8 pretzels.

1 1/2 cups warm (110 to 115 degrees F) water
1 tablespoon sugar
2 teaspoons kosher salt
1 package active dry yeast
22 ounces all-purpose flour, approximately 4 1/2 cups
2 ounces unsalted butter, melted
Vegetable oil, for pan
10 cups water
2/3 cup baking soda
1 large egg yolk beaten with 1 tablespoon water
Pretzel salt

Combine the water, sugar and kosher salt in the bowl of a stand mixer and sprinkle the yeast on top. Allow to sit for 5 minutes or until the mixture begins to foam. Add the flour and butter and, using the dough hook attachment, mix on low speed until well combined. Change to medium speed and knead until the dough is smooth and pulls away from the side of the bowl, approximately 4 to 5 minutes. Remove the dough from the bowl, clean the bowl and then oil it well with vegetable oil. Return the dough to the bowl, cover with plastic wrap and sit in a warm place for approximately 50 to 55 minutes or until the dough has doubled in size.

Preheat the oven to 450 degrees F. Line 2 half-sheet pans with parchment paper and lightly brush with the vegetable oil. Set aside.

Bring the 10 cups of water and the baking soda to a rolling boil in an 8-quart saucepan or roasting pan.

In the meantime, turn the dough out onto a slightly oiled work surface and divide into 8 equal pieces. Roll out each piece of dough into a 24-inch rope. Make a U-shape with the rope, holding the ends of the rope, cross them over each other and press onto the bottom of the U in order to form the shape of a pretzel. Place onto the parchment-lined half sheet pan.


Place the pretzels into the boiling water, 1 by 1, for 30 seconds. Remove them from the water using a large flat spatula. Return to the half sheet pan, brush the top of each pretzel with the beaten egg yolk and water mixture and sprinkle with the pretzel salt. Bake until dark golden brown in color, approximately 12 to 14 minutes. Transfer to a cooling rack for at least 5 minutes before serving.


This one is slightly heart-shaped!

Monday, February 28, 2011

Blueberry White Chocolate Chip Dumplings


Yep, that's a fresh, warm, gooey, ever-so-slightly-lemony (and really messy!) blueberry white chocolate swirl.

Cinnamon rolls [if you're wondering why I'm talking about cinnamon rolls when the post is clearly titled "Dumplings", and I just called them "swirls", well, we'll get to that... ] are one of those things on a list of about ten foods that I absolutely can't stand. I think it has to do with the fact that
1. usually, they're cloyingly sweet
2. there was a brief period in my childhood where I ate a lot of really unhealthy food, but we'll get to that's a story for another post.
I have this habit, though, for better or for worse, concerning cooking, eating, and really everything, of trying to find something to like about a given thing when I really dislike it. When I saw Ashley's unique take on cinnamon-less cinnamon rolls (which she received third place prize for the BC Blueberry contest! ), and being that everything else I've cooked verbatim or adapted ever-so-slightly from her blog was so wonderfully incredibly delicious- I thought I'd give it a shot.

Seriously, Ashley's blog has opened up a whole new world of baking joyfulness, and she has enlightened me about so many new good cookbooks, and the best way I can think to give back is to make this transitionary week from February 28th to March 7th an eat me, delicious tribute week. Thus, I decided to journey into the uncertain lands of cinnamon rolls sans cinnamon.

Now, the multiple names: my cinnamon rolls ended up more like sweet blueberry dumplings than cinnamon rolls, but I am certain that's probably my fault because I added too much liquid by virtue of mistaking my 1/3 measuring cup for a 1/4 measuring cup (whoops!). To try and compensate, I added a tablespoon of flour and asked someone around me if they thought that was alright. In retrospect, 1 tablespoon was definitely not enough flour to right my wet ingredient wrong, but hey, it was a learning experience! Additionally, one of the reasons I think these turned out more like dumplings than cinnamon rolls was that when I cut through the log to make the nine little rolls my knife wasn't sharp enough and ruptured some of the layers. Regardless, they were still demolished, and the flavor was perfect, but the rolls didn't have the consistency I was looking for.

I struggled with whether to post this recipe or not. I like the idea of posting only recipes that I think are really tasty (and that I've been successful in making), but I also like the idea of posting about how I messed a recipe up, for authenticity's sake. I think it's important if something doesn't turn out absolutely perfect not to get discouraged (and maybe even find something to like about it!). Most importantly, I like sharing good food. Despite my numerous errors, this recipe was good. For my eat me, delicious tribute week at least, I'll post every thing I bake from her blog. After this week I promise to find other amazing websites and blogs. Find something good and share it, right?! What are your favorite food blogs/cookbooks/websites?


Blueberry White Chocolate Swirls with Lemon Glaze

Adapted, accidentally, and very poorly from eat, me delicious (whose rolls look beautiful and mouth-wateringly good! Definitely deserved at least third place!)

Makes 9 rolls

Ingredients
2 cups and 1 tablespoon flour
1 tbsp sugar
1 tbsp baking powder
1/4 tsp salt
3/4 cup milk
(I used 5/6 cup)
1/4 cup oil
(I used 1/3 cup)
1 tablespoon vanilla
1 heaping cup blueberries, washed and patted dry (or 1 cup frozen blueberries)
1/2 cup white chocolate chips
juice of one, really juicy lemon
2 tablespoons powdered sugar

Directions
Preheat the oven to 350F. Butter an 8"x8" square pan.

Combine flour, sugar, baking powder and salt. In a separate bowl combine milk, oil and vanilla. Add the wet mixture to the dry, and stir just until the flour disappears and you have a nice dough.

Lightly flour a work surface. Roll out the dough to a 9"x14" rectangle. Sprinkle the white chocolate chips and blueberries, and gently press them into the dough. Starting from the long side, roll up the dough into a log. Cut it into 9 biscuits and place them in the prepared pan. Bake for 25-30 minutes, or until golden brown.

Meanwhile, prepare the lemon glaze by mixing together the lemon juice and icing sugar.

Once the rolls are done, invert them onto a plate, and drizzle the glaze over top. Serve while warm, but also good at room temperature.


My little blueberry white chocolate dumpling :) intact this time!

Sunday, February 27, 2011

Spinach Walnut Pesto-ey Pasta


One of my favorite all time foods is pesto, so imagine my delight when I found this recipe on eat me, delicious who adapted from Quick-Fix Vegetarian. Walnuts, spinach, and flax seed? I couldn't have been happier. I love fixing my family healthy delicious food and this recipe looked (and absolutely was!) amazing. We recently unearthed our food processor too, after years in hibernation, when I made baklava. The food processor is great, especially for finely uniformly chopped foodstuffs. Ours is super tiny, but it makes cooking so much easier! I digress, back to the pesto: my dad said it could have used parmesan cheese (it's vegan as is) and my brother said that reducing the amount of olive oil made it a lot drier than normal pesto but that he thought normal pesto was too oily, so next time I might add somewhere between 1/4 cup of olive oil and 1/3 cup of olive oil.

Serves 4-5

makes about 2 cups, serves 4 with pasta

Ingredients
3 cups fresh spinach
4 cloves garlic
1/2 teaspoon salt
1 cup firmly packed fresh parsley leaves
1/3 cup walnut pieces
1 cup fresh basil
2 tbsp ground flax seed
(whoops! looking over this I realized I didn't grind the flax seeds.)
1/4 cup extra-virgin olive oil or walnut oil
(I might add more oil next time, the pasta was a little drier than normal pesto)
1 block of baked tofu (mine was 7 oz)
(I couldn't find smoked tofu, which the recipe originally called for, at either TJ's or our local health food store. Where do you get smoked tofu?)


Meanwhile, steam the spinach over boiling water for 1 minute, or wilt it in a covered bowl in the microwave for about 3 minutes.
(I really struggled with this step for some reason. I've made gyoza before by frying then steaming them but for some reason, without a special steaming device, I felt like I needed a solution that wasn't provided above. Does this ever happen to any of you- where you have a cooking block that you just can't seem to get past? I didn't want to blanch all the flavor and nutrients out of the spinach, but I also wanted to have a good consistency for the sauce. What I ended up doing was really ridiculous: I rinsed baby spinach in a colander, and then dipped the bottom of the colander into the boiling water I was preparing for the pasta for about two seconds. Then I tossed the wilted spinach with the fresher spinach while still in the colander).
Mince the garlic with the salt in a food processor. Squeeze any moisture from the spinach and add to the food processor along with the parsley, basil, flax seeds and walnuts. Puree until smooth. Add the olive oil gradually and process to a smooth paste.

Cut up baked tofu into squares or small strips. In the pot that you cooked the pasta in, add the pesto and the tofu. Heat over low until tofu is hot.


so healthy and tasty!

Saturday, February 26, 2011

Thai Chick-Un Pizza


I guess I'm on a peanut butter kick. After devouring the remainder of those peanut butter cookies, and most of a box of Tagalongs, I decided that the main course for tonight's dinner should be Thai pizza. Luckily, Ashley, author and baker extraordinaire of "eat me, delicious", has adapted recipes for some of my favorite breakfast, lunch, and dinner foods. I'm so happy I could throw a parade. Instead, I'll just have to start cooking with profe more than once a week.

So, we set to work. As an asian-american cat, he always approves of asian food. And as an enlightened being, he enjoyed the irie coloring of the pizza.

I hope you like jammin' [while eating this yummy pizza] too.


Thai Chick-Un Pizza
Adapted from eat me, delicious who adapted from Eat, Drink & Be Vegan

makes 8 large slices on a 14 inch pizza pan. Feeds about 5.

Peanut Sauce*

2/3 cup organic creamy peanut butter
1/3 cup ketchup
2 tbsp rice vinegar
2 tbsp low sodium soy sauce (I used Bragg's)
4 large cloves garlic, quartered
2 heaping tbsp fresh ginger, chopped
1/4 cup soy milk
(I might use coconut milk next time)
1 tsp agave nectar/syrup
(note: I would add maybe 1/4 - 1/2 c. of crushed red pepper next time because I just ended up dumping 3 tablespoons on my slice of pizza anyway)


1 14-16 inch whole wheat pizza shell for thin crust (see recipe below)
(my pizza pan is either 14 or 16 inches)

1 cup cooked garbanzo beans
(I used canned)
1 red bell pepper, diced
1 cup fresh pineapple, chopped
(I used precut pineapple from Trader Joe's refrigerated section)
3/4 cup snow peas, chopped
1/2 cup green onions, sliced
peanuts, chopped (garnish)
fresh cilantro leaves (garnish)

To prepare peanut sauce:
In a food processor, add peanut butter, ketchup, rice vinegar, soy sauce, garlic, ginger, soy milk and agave nectar/syrup, and puree until smooth.

Preheat the oven to 450 F. Prepare a pizza pan with 1 1/2 tbsp of olive oil and a sprinkle of flour (I used Kamut flour) the pizza pan. Roll or stretch the ball of dough to fit your pizza pan. (Note: for a short cut, I frequently use Trader Joe's whole wheat pizza dough. For thin crust on a 14-16 inch pan, use about half of the bag of dough. For thick crust use the whole bag)


Spread peanut sauce evenly on pizza crust. In a bowl, lightly flatten chickpeas with a large spoon (or in palm of your hand), and distribute evenly over sauce. Distribute bell pepper, pineapple and snow peas evenly. Bake for 10-15 minutes (depending on crust thickness), sprinkling on green onions for last minute of cooking, until the crust is golden and toppings have heated through. Serve sprinkled with chopped peanuts and cilantro if desired.


Pizza dough recipe from epicurious

Ingredients

1 cup (or more) warm water (105°F to 115°F)
1 1/2 teaspoons active dry yeast
2 cups unbleached all purpose flour
3/4 cup unbleached white whole wheat flour
3 tablespoons vital wheat gluten*
1 1/2 teaspoons coarse kosher salt
3 tablespoons extra-virgin olive oil, divided

Preparation

Whisk 1 cup warm water and yeast in small bowl; let stand until yeast dissolves, about 5 minutes. Using on/off turns, mix both flours, wheat gluten, and coarse salt in processor. Whisk 2 tablespoons oil into yeast mixture. With machine running, gradually add yeast mixture through feed tube of processor. Process until dough forms ball, adding more warm water by teaspoonfuls if dry, about 1 minute. Transfer dough to floured work surface; knead until dough comes together.

Brush large bowl with 1 tablespoon oil. Place dough in bowl; turn to coat. Cover bowl with kitchen towel. Let rise in warm draft-free area until doubled in size, 1 1/2 to 2 hours. Punch dough down. Divide in half; form into 2 balls. DO AHEAD: Place each ball in separate resealable plastic bag. Chill up to 4 days or freeze up to 1 month. Let chilled dough stand 1 hour or frozen dough stand 4 hours at room temperature before rolling.

*The sauce tastes a little salty by itself, but it evens out nicely with the sweetness of the fresh pineapple and red bell pepper.

nom nom nom :)

Monday, February 21, 2011

Peanut Butter Cookies

This week, and honestly on a craving for eating peanut butter cookie dough, I decided to make peanut butter cookies. Since I came back from New York, Profe has been following me around nonstop and curling up in this circular pseudo-fetal position in my lap, on my bed, and burrowing into the blankets to snuggle with me on the couch. Drawing my inspiration from his warm, endearing, and cuddly shape, I decided to return to cookies as a comforting expression of our reciprocal love.

Also, in both weird and awesome news: I found my doppelgänger. We both write food blogs, prefer vegetarian food, particularly enjoy baking desserts, post pictures of our cats, have or are working on a bachelor's degree in psychology, and talk about how our food was received by our significant others and family in our posts.

Scrolling through her blog, I found the recipe for these cookies, adapted from Dana Treat, which she got from Baked (phew!). I actually stumbled upon "eat me, delicious" after googling the recipe for a lemon coconut cake, wishing to emulate the incredibly moist and delicious lemon cake a woman was sampling at the farmer's market yesterday. What I found was even more irresistible. These are certainly the best peanut butter cookies I've ever made, maybe the best that I've ever tasted, and oh man, they are incredibly addictive. Normally I can stop at a sliver of pie or a half a cookie, but I think I've eaten roughly about eleven cookies, not including delicious heaps of dough I ate, of course. I forlornly gaze every couple hours at the dwindling cookie supply, which is down to single digits in the jar. This recipe is amazing. Please try it for yourself and succumb to inevitable cookie overdose with me.

Recommended beverage: unsweetened soymilk and/or coffee with a dash of cinnamon. (Dipping the already soft peanut butter cookies in unsweetened soymilk is heavenly.)

Makes 30 large Cookies

1 3/4 cups all purpose flour
2 tsp baking soda
1 tsp salt
(make sure you have really fine salt. I used fancy larger-clumped salt and as a result the first cookie I bit into was a little salty)
1 cup (2 sticks) unsalted butter, softened, cut into 1-inch pieces
(I used salted butter)
1 cup granulated sugar, plus more for sprinkling
(I used 1/4 cup of light brown and 1/4 cup of granulated)
1 cup firmly packed dark brown sugar
2 large eggs
1 tsp pure vanilla extract
(I used about 1 tbsp vanilla extract)
1 cup creamy peanut butter
(I always buy the peanut butter with the fewest possible ingredients. The peanut butter's label I use reads: "dry roasted organic peanuts, salt")

Sift the flour, baking soda, and salt into a medium bowl and set aside.

In the bowl of an electric mixer fitted with the paddle attachment, beat the butter and both sugars together until fluffy. Scrape down the bowl and add the eggs, one at a time, beating until each is incorporated. The mixture will look light and fluffy. Add the vanilla and peanut butter and beat until just incorporated.

Add half the flour mixture and mix for 15 seconds. Add the remaining flour mixture and mix until just incorporated. Cover the bowl tightly and refrigerate for at least 3 hours.

Preheat the oven to 375F. Line two baking sheets with parchment paper or Silpat baking mats.
(I didn't grease or line the baking sheet, used a very thin spatula to transfer the cookies to the wire racks, and had absolutely no problems)

Drop the dough by rounded tablespoons onto the prepared sheets, at least 2 inches apart. With the palm of your hand, very gently press each cookie down so it forms a very tall disk shape. Do not press too hard and do not press it flat.

Sprinkle the tops of the cookies with granulated sugar (I eliminated this step) and bake for 10 to 12 minutes, rotating the pan halfway through the baking time (I didn't do this either), until the tops of the cookies just begin to brown.

Remove the pan from the oven and cool on a wire rack for 5 minutes. Use a spatula to transfer the individual cookies to the rack to cool completely (Ashley of "eat me, delicious" said "although they are delicious warm" and I completely agree: I always prefer freshly baked cookies).