Showing posts with label baked goods. Show all posts

Thursday, March 3, 2011

Orange Cream Cheese Muffins with Pepita Crunch


Fourth recipe in the eat me, delicious tribute week!

I was immediately drawn to this recipe. Cheesecake? Always. Citrus? Intravenously, please. Seeds? Welcome anytime. Delicious baked goods? Definitely. Suffice to say, these are really good muffins. They're not health food by any stretch of the imagination and I think they taste rather cakey (but my brother didn't think so), but still so delicious. I assumed they would taste more like cake and less like muffins because of the really time-consuming and labor intensive mixing (secret to excellent soft cakes and cheesecake, by the way) and that the directions stipulated you needed to add the ingredients little by little (other secret of really delicious sweet good baking). Generally, muffins are less mixed which makes them more crumbly.

I didn't think the cream cheese flavor was that prominent, but Ashley did, so you should try them for yourself and tell me what you think.
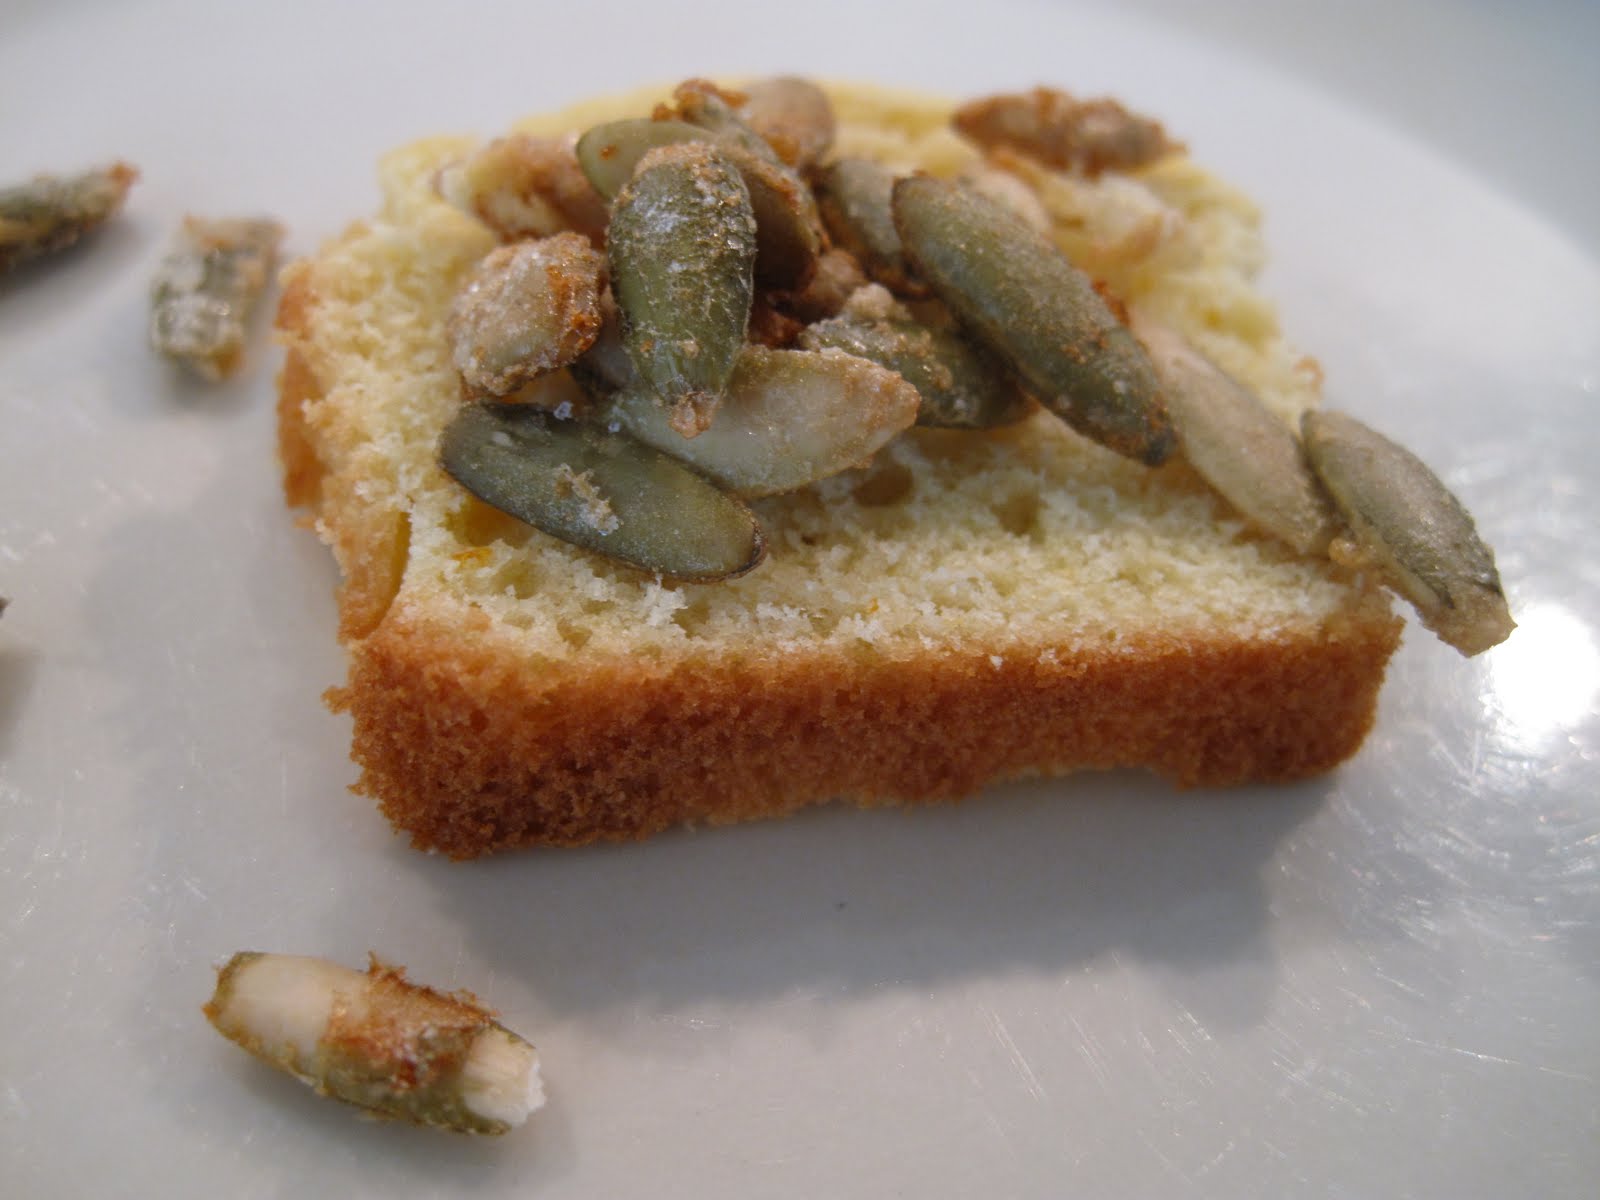


That being said, I really enjoyed these muffins. The pepita crunch was a welcome texture, and I especially liked sprinkling the leftovers on slices of the muffins (yum!)

My only frustration with the recipe was trying to scrape the pepita crunch off of the baking sheet. I didn't grease the pan at all, so this should be completely unsurprising (are you nonplussed?), but I also thought that there was a lot of leftover egg white which concerned me when I opened up the oven and it looked like I was making seedy scrambled eggs. Maybe one egg white to 1/4 cup of pepitas is not the right ratio? I don't know, but the seeds ended up tasting really good and not so eggy and after some enthusiastic scrubbing my cookie sheet is clean too.

Oh, and there was that part where I clumsily hit the muffin tin against the middle baking rack and two of my muffins toppled face-down onto the oven door. I just about cried, but luckily my mom was there to help me pick up the two I lost and encourage me to continue (thanks mom!).


Definitely try this one out if you're in a dessert muffin mood.


Makes 12 muffins

Found on eat me, delicious

Orange Cream Cheese Muffins (with Pepita Crunch)
Great Coffee Cakes, Sticky Buns, Muffins & More


Pepita Crunch
1 large egg white (reserve yolk)
2 tbsp plus 1 tsp granulated sugar
1/2 cup pepitas (pumpkin seeds)

Muffins
1/2 small navel orange, cut into 6 to 8 pieces (zest, pith and flesh)
4 ounces cream cheese, at room temperature, broken into 3 to 4 pieces
2 cups all purpose flour, spooned in and leveled
1/2 tsp baking powder
1/4 tsp baking soda
1/2 cup (1 stick) unsalted butter, slightly firm
1 cup superfine sugar
2 large eggs
1 large egg yolk (reserved from pepita crunch)
1 tsp pure vanilla extract

1. Position the racks in the upper and lower thirds of the oven. Heat the oven to 350F. Spray a rimmed cookie sheet with nonstick cooking spray.

Make the pepita crunch:
2. In a small bowl, whisk together the egg white and 1 tablespoon of the granulated sugar. Add the pumpkin seeds, tossing to coat well with the egg/sugar mixture. Pour into the prepared cookie sheet and spread evenly in a single layer. Sprinkle 1 more tablespoon of the sugar over the pepitas. Bake for 7 to 8 minutes, stir the pepitas with a fork, and bake for another 7 minutes. Remove from the oven, stir the pepitas, sprinkle with the remaining 1 teaspoon of sugar, and bake for another 3 minutes. Remove from the oven and allow to cool. Break up any clusters with your fingertips and set aside. (Ashley note: I found this baking time too long.)

Make the batter:
3. Increase the oven temperature to 375F. Line fourteen muffin cups with paper or foil cupcake liners.

4. Fit a food processor with the steel blade. With the machine on, drop the orange pieces through the feeder tube. Process until finely chopped, then measure 1/4 cup pulp and return it to the processor bowl. (Discard any remaining orange.) Add the cream cheese and process in three 10-second intervals, scraping down the side of the bowl after each process. The mixture should retain some orange texture.

5. In a large bowl, thoroughly whisk together the flour, baking powder, salt and baking soda. Set aside.

6. Cut the butter into 1-inch pieces and place in the bowl of an electric mixer fitted with the paddle attachment. Mix on medium speed until smooth and lightened in color, about 1 minute. Stop the machine and add the cream cheese/orange mixture, then mix on medium speed for 1 minute. Add the superfine sugar in a steady stream, then blend in the eggs, the reserved yolk, and the vanilla.

7. Reduce the mixer speed to low and add the flour mixture in three additions, mixing just until blended after each addition.

Bake the muffins:
8. Portion level scoops of the batter into the prepared pans using a no. 16 ice cream scoop (1/4 cup capacity). Sprinkle the top of each muffin with 1 tablespoon of the pepita crunch. Be sure to use any sugar the remains in the pan.

9. Bake for 22 to 25 minutes, or until the muffins are golden brown and the tops are springy to the touch. To ensure even baking, toward the end of baking time, rotate the pans top to bottom and front to back. Remove from the oven and place on a rack to cool.

Wednesday, March 2, 2011

Coconut Oatmeal Cookies


Happy Hinamatsuri (a.k.a Girls' Day)! When I was a little girl growing up in Hawaii, we celebrated girl's day every year. Although I said this week would be eat me, delicious tribute week, I really wanted to make hishimochi. So my dad and I set out on a mission, we drove to three different stores but none of them carried glutinous rice flour. I guess we're the last gluten-loving people on the planet. Oh well, next year! I'll keep my eyes peeled, though, because I'd love to figure out how to make red bean stuffed mochi and mochi ice cream. Maybe I'll try somewhere like Ranch 99 next chance I get. Any other suggestions? Where would you all get glutinous rice flour from?

I needed to make something delicious to celebrate those double x chromosomes and my new favorite food blog, so I set to search and found a coconut cookie recipe. Given that I spent my early childhood in Hawaii eating mostly tofu, fruits, and vegetables (okay, and spam musubi and manapua, too), I love almost all things fruit, coconut especially. I had never baked with coconut before, and wasn't quite sure what to expect, but it is undoubtedly of my new favorite baking ingredients. I used the thicker unsweetened coconut (so good!) and organic oatmeal (mmmm!) and ended up with incredible cookies, but they were certainly a mouthful because of the large hunks of coconut. I didn't add the chocolate, and decided to make them more soft and chewy than crunchy, which I think is a personal preference. They were gone less than twelve hours later!

I received this phone call around 4:30: "Hey Erin, I just got home and I ate about three of your cookies in thirty seconds. I hope you don't mind, I was calling to make sure you wouldn't be upset if they were all gone by the time you got back. Your cookies are amazing, sweetie. Love you lots."

I was overjoyed. That was totally the purpose of making them.

May your baking adventures be as fruitful as mine (bad pun intended)!

Makes about 29 medium sized cookies
Coconut Cookies
adapted from: eat me, delicious, Barbara Boczany & This Week for Dinner

1 cup (2 sticks) unsalted butter
1 cup brown sugar, packed
6 tbsp sugar
2 large eggs
1 1/2 tsp vanilla
1/2 tsp salt
1/2 tsp baking soda
1 cup flour
2 1/4 cups oats
1 1/2 cups dried unsweetened shredded coconut*

Preheat oven to 375F. Beat butter and sugars at high speed until fluffy. Add eggs and beat till blended. Beat in vanilla, baking soda, and salt. Add flour and mix at low speed until blended. Stir in oats, coconut and chocolate.

Arrange 1/4 cup mounds about 3 inches apart on large buttered baking sheets. Pat down to 1/2 inch. Bake on middle rack, 10 minutes (note: my rickety old oven is really inefficient, your baking time should probably be around 8 minutes). Cool one minute. Transfer to cooling rack.

*I made these with 1 heaping cup of unsweetened shredded and 1 cup of flaked coconut, and used ener-g egg replacer and earth balance to make it vegan. less nutritional value/ more ethical. i used semisweet chocolate chips on the last batch of cookies. Makes about 36.

Tuesday, March 1, 2011

Soft, Lovely Pretzels


Before finals kick in, I decided to make this week a tribute to my new favorite food blog, eat me, delicious (sorry if you are getting sick of hearing me dote, but the food Ashley blogs about is so good!). So I suppose this will be the second recipe for my eat me, delicious tribute week, and we'll count the first one as yesterday's introduction to the goodness of white chocolate.

Back to bendy food: pretzels are one of those breads that I really enjoy but rarely eat. California just isn't chock-full of pretzel vendors, unfortunately. I wrote in my first post that part of the reason I enjoy baking is to make other people happy. My dad had been asking me to make pretzels for a while, so I finally caved after I found scrumptious looking pretzels on Ashley's blog. They're surprisingly easy to make, too! My dad, Profe, and our dog, Elric, all flocked to the baking party, and Profe tried to steal a piece of my pretzel, the scoundrel! But don't worry, only dads were fed. :)

Ashley got the recipe from Alton Brown. A while ago, my best friend had mentioned that one of her favorite shows was "Good Eats" but I had never really watched Alton's cooking show (or any cooking show for that matter) or had any inkling about his culinary craftsmanship before today. I've been missing out. Check out his delicious looking enchilada lasagna. That's definitely on my ever-growing list of things to make.

Speaking of making things, these pretzels are fun, easy, and a deliciously comforting food. The baking powder in the boiling water created a huge mess, but the fun of making this recipe was totally worth it (and now my stove is really clean too!).

Enjoy!


Soft Pretzels
Found on eat me, delicious who got the recipe from Alton Brown

Makes 8 pretzels.

1 1/2 cups warm (110 to 115 degrees F) water
1 tablespoon sugar
2 teaspoons kosher salt
1 package active dry yeast
22 ounces all-purpose flour, approximately 4 1/2 cups
2 ounces unsalted butter, melted
Vegetable oil, for pan
10 cups water
2/3 cup baking soda
1 large egg yolk beaten with 1 tablespoon water
Pretzel salt

Combine the water, sugar and kosher salt in the bowl of a stand mixer and sprinkle the yeast on top. Allow to sit for 5 minutes or until the mixture begins to foam. Add the flour and butter and, using the dough hook attachment, mix on low speed until well combined. Change to medium speed and knead until the dough is smooth and pulls away from the side of the bowl, approximately 4 to 5 minutes. Remove the dough from the bowl, clean the bowl and then oil it well with vegetable oil. Return the dough to the bowl, cover with plastic wrap and sit in a warm place for approximately 50 to 55 minutes or until the dough has doubled in size.

Preheat the oven to 450 degrees F. Line 2 half-sheet pans with parchment paper and lightly brush with the vegetable oil. Set aside.

Bring the 10 cups of water and the baking soda to a rolling boil in an 8-quart saucepan or roasting pan.

In the meantime, turn the dough out onto a slightly oiled work surface and divide into 8 equal pieces. Roll out each piece of dough into a 24-inch rope. Make a U-shape with the rope, holding the ends of the rope, cross them over each other and press onto the bottom of the U in order to form the shape of a pretzel. Place onto the parchment-lined half sheet pan.


Place the pretzels into the boiling water, 1 by 1, for 30 seconds. Remove them from the water using a large flat spatula. Return to the half sheet pan, brush the top of each pretzel with the beaten egg yolk and water mixture and sprinkle with the pretzel salt. Bake until dark golden brown in color, approximately 12 to 14 minutes. Transfer to a cooling rack for at least 5 minutes before serving.


This one is slightly heart-shaped!

Monday, February 28, 2011

Blueberry White Chocolate Chip Dumplings


Yep, that's a fresh, warm, gooey, ever-so-slightly-lemony (and really messy!) blueberry white chocolate swirl.

Cinnamon rolls [if you're wondering why I'm talking about cinnamon rolls when the post is clearly titled "Dumplings", and I just called them "swirls", well, we'll get to that... ] are one of those things on a list of about ten foods that I absolutely can't stand. I think it has to do with the fact that
1. usually, they're cloyingly sweet
2. there was a brief period in my childhood where I ate a lot of really unhealthy food, but we'll get to that's a story for another post.
I have this habit, though, for better or for worse, concerning cooking, eating, and really everything, of trying to find something to like about a given thing when I really dislike it. When I saw Ashley's unique take on cinnamon-less cinnamon rolls (which she received third place prize for the BC Blueberry contest! ), and being that everything else I've cooked verbatim or adapted ever-so-slightly from her blog was so wonderfully incredibly delicious- I thought I'd give it a shot.

Seriously, Ashley's blog has opened up a whole new world of baking joyfulness, and she has enlightened me about so many new good cookbooks, and the best way I can think to give back is to make this transitionary week from February 28th to March 7th an eat me, delicious tribute week. Thus, I decided to journey into the uncertain lands of cinnamon rolls sans cinnamon.

Now, the multiple names: my cinnamon rolls ended up more like sweet blueberry dumplings than cinnamon rolls, but I am certain that's probably my fault because I added too much liquid by virtue of mistaking my 1/3 measuring cup for a 1/4 measuring cup (whoops!). To try and compensate, I added a tablespoon of flour and asked someone around me if they thought that was alright. In retrospect, 1 tablespoon was definitely not enough flour to right my wet ingredient wrong, but hey, it was a learning experience! Additionally, one of the reasons I think these turned out more like dumplings than cinnamon rolls was that when I cut through the log to make the nine little rolls my knife wasn't sharp enough and ruptured some of the layers. Regardless, they were still demolished, and the flavor was perfect, but the rolls didn't have the consistency I was looking for.

I struggled with whether to post this recipe or not. I like the idea of posting only recipes that I think are really tasty (and that I've been successful in making), but I also like the idea of posting about how I messed a recipe up, for authenticity's sake. I think it's important if something doesn't turn out absolutely perfect not to get discouraged (and maybe even find something to like about it!). Most importantly, I like sharing good food. Despite my numerous errors, this recipe was good. For my eat me, delicious tribute week at least, I'll post every thing I bake from her blog. After this week I promise to find other amazing websites and blogs. Find something good and share it, right?! What are your favorite food blogs/cookbooks/websites?


Blueberry White Chocolate Swirls with Lemon Glaze

Adapted, accidentally, and very poorly from eat, me delicious (whose rolls look beautiful and mouth-wateringly good! Definitely deserved at least third place!)

Makes 9 rolls

Ingredients
2 cups and 1 tablespoon flour
1 tbsp sugar
1 tbsp baking powder
1/4 tsp salt
3/4 cup milk
(I used 5/6 cup)
1/4 cup oil
(I used 1/3 cup)
1 tablespoon vanilla
1 heaping cup blueberries, washed and patted dry (or 1 cup frozen blueberries)
1/2 cup white chocolate chips
juice of one, really juicy lemon
2 tablespoons powdered sugar

Directions
Preheat the oven to 350F. Butter an 8"x8" square pan.

Combine flour, sugar, baking powder and salt. In a separate bowl combine milk, oil and vanilla. Add the wet mixture to the dry, and stir just until the flour disappears and you have a nice dough.

Lightly flour a work surface. Roll out the dough to a 9"x14" rectangle. Sprinkle the white chocolate chips and blueberries, and gently press them into the dough. Starting from the long side, roll up the dough into a log. Cut it into 9 biscuits and place them in the prepared pan. Bake for 25-30 minutes, or until golden brown.

Meanwhile, prepare the lemon glaze by mixing together the lemon juice and icing sugar.

Once the rolls are done, invert them onto a plate, and drizzle the glaze over top. Serve while warm, but also good at room temperature.


My little blueberry white chocolate dumpling :) intact this time!

Saturday, February 26, 2011

Thai Chick-Un Pizza


I guess I'm on a peanut butter kick. After devouring the remainder of those peanut butter cookies, and most of a box of Tagalongs, I decided that the main course for tonight's dinner should be Thai pizza. Luckily, Ashley, author and baker extraordinaire of "eat me, delicious", has adapted recipes for some of my favorite breakfast, lunch, and dinner foods. I'm so happy I could throw a parade. Instead, I'll just have to start cooking with profe more than once a week.

So, we set to work. As an asian-american cat, he always approves of asian food. And as an enlightened being, he enjoyed the irie coloring of the pizza.

I hope you like jammin' [while eating this yummy pizza] too.


Thai Chick-Un Pizza
Adapted from eat me, delicious who adapted from Eat, Drink & Be Vegan

makes 8 large slices on a 14 inch pizza pan. Feeds about 5.

Peanut Sauce*

2/3 cup organic creamy peanut butter
1/3 cup ketchup
2 tbsp rice vinegar
2 tbsp low sodium soy sauce (I used Bragg's)
4 large cloves garlic, quartered
2 heaping tbsp fresh ginger, chopped
1/4 cup soy milk
(I might use coconut milk next time)
1 tsp agave nectar/syrup
(note: I would add maybe 1/4 - 1/2 c. of crushed red pepper next time because I just ended up dumping 3 tablespoons on my slice of pizza anyway)


1 14-16 inch whole wheat pizza shell for thin crust (see recipe below)
(my pizza pan is either 14 or 16 inches)

1 cup cooked garbanzo beans
(I used canned)
1 red bell pepper, diced
1 cup fresh pineapple, chopped
(I used precut pineapple from Trader Joe's refrigerated section)
3/4 cup snow peas, chopped
1/2 cup green onions, sliced
peanuts, chopped (garnish)
fresh cilantro leaves (garnish)

To prepare peanut sauce:
In a food processor, add peanut butter, ketchup, rice vinegar, soy sauce, garlic, ginger, soy milk and agave nectar/syrup, and puree until smooth.

Preheat the oven to 450 F. Prepare a pizza pan with 1 1/2 tbsp of olive oil and a sprinkle of flour (I used Kamut flour) the pizza pan. Roll or stretch the ball of dough to fit your pizza pan. (Note: for a short cut, I frequently use Trader Joe's whole wheat pizza dough. For thin crust on a 14-16 inch pan, use about half of the bag of dough. For thick crust use the whole bag)


Spread peanut sauce evenly on pizza crust. In a bowl, lightly flatten chickpeas with a large spoon (or in palm of your hand), and distribute evenly over sauce. Distribute bell pepper, pineapple and snow peas evenly. Bake for 10-15 minutes (depending on crust thickness), sprinkling on green onions for last minute of cooking, until the crust is golden and toppings have heated through. Serve sprinkled with chopped peanuts and cilantro if desired.


Pizza dough recipe from epicurious

Ingredients

1 cup (or more) warm water (105°F to 115°F)
1 1/2 teaspoons active dry yeast
2 cups unbleached all purpose flour
3/4 cup unbleached white whole wheat flour
3 tablespoons vital wheat gluten*
1 1/2 teaspoons coarse kosher salt
3 tablespoons extra-virgin olive oil, divided

Preparation

Whisk 1 cup warm water and yeast in small bowl; let stand until yeast dissolves, about 5 minutes. Using on/off turns, mix both flours, wheat gluten, and coarse salt in processor. Whisk 2 tablespoons oil into yeast mixture. With machine running, gradually add yeast mixture through feed tube of processor. Process until dough forms ball, adding more warm water by teaspoonfuls if dry, about 1 minute. Transfer dough to floured work surface; knead until dough comes together.

Brush large bowl with 1 tablespoon oil. Place dough in bowl; turn to coat. Cover bowl with kitchen towel. Let rise in warm draft-free area until doubled in size, 1 1/2 to 2 hours. Punch dough down. Divide in half; form into 2 balls. DO AHEAD: Place each ball in separate resealable plastic bag. Chill up to 4 days or freeze up to 1 month. Let chilled dough stand 1 hour or frozen dough stand 4 hours at room temperature before rolling.

*The sauce tastes a little salty by itself, but it evens out nicely with the sweetness of the fresh pineapple and red bell pepper.

nom nom nom :)

Monday, February 21, 2011

Peanut Butter Cookies

This week, and honestly on a craving for eating peanut butter cookie dough, I decided to make peanut butter cookies. Since I came back from New York, Profe has been following me around nonstop and curling up in this circular pseudo-fetal position in my lap, on my bed, and burrowing into the blankets to snuggle with me on the couch. Drawing my inspiration from his warm, endearing, and cuddly shape, I decided to return to cookies as a comforting expression of our reciprocal love.

Also, in both weird and awesome news: I found my doppelgänger. We both write food blogs, prefer vegetarian food, particularly enjoy baking desserts, post pictures of our cats, have or are working on a bachelor's degree in psychology, and talk about how our food was received by our significant others and family in our posts.

Scrolling through her blog, I found the recipe for these cookies, adapted from Dana Treat, which she got from Baked (phew!). I actually stumbled upon "eat me, delicious" after googling the recipe for a lemon coconut cake, wishing to emulate the incredibly moist and delicious lemon cake a woman was sampling at the farmer's market yesterday. What I found was even more irresistible. These are certainly the best peanut butter cookies I've ever made, maybe the best that I've ever tasted, and oh man, they are incredibly addictive. Normally I can stop at a sliver of pie or a half a cookie, but I think I've eaten roughly about eleven cookies, not including delicious heaps of dough I ate, of course. I forlornly gaze every couple hours at the dwindling cookie supply, which is down to single digits in the jar. This recipe is amazing. Please try it for yourself and succumb to inevitable cookie overdose with me.

Recommended beverage: unsweetened soymilk and/or coffee with a dash of cinnamon. (Dipping the already soft peanut butter cookies in unsweetened soymilk is heavenly.)

Makes 30 large Cookies

1 3/4 cups all purpose flour
2 tsp baking soda
1 tsp salt
(make sure you have really fine salt. I used fancy larger-clumped salt and as a result the first cookie I bit into was a little salty)
1 cup (2 sticks) unsalted butter, softened, cut into 1-inch pieces
(I used salted butter)
1 cup granulated sugar, plus more for sprinkling
(I used 1/4 cup of light brown and 1/4 cup of granulated)
1 cup firmly packed dark brown sugar
2 large eggs
1 tsp pure vanilla extract
(I used about 1 tbsp vanilla extract)
1 cup creamy peanut butter
(I always buy the peanut butter with the fewest possible ingredients. The peanut butter's label I use reads: "dry roasted organic peanuts, salt")

Sift the flour, baking soda, and salt into a medium bowl and set aside.

In the bowl of an electric mixer fitted with the paddle attachment, beat the butter and both sugars together until fluffy. Scrape down the bowl and add the eggs, one at a time, beating until each is incorporated. The mixture will look light and fluffy. Add the vanilla and peanut butter and beat until just incorporated.

Add half the flour mixture and mix for 15 seconds. Add the remaining flour mixture and mix until just incorporated. Cover the bowl tightly and refrigerate for at least 3 hours.

Preheat the oven to 375F. Line two baking sheets with parchment paper or Silpat baking mats.
(I didn't grease or line the baking sheet, used a very thin spatula to transfer the cookies to the wire racks, and had absolutely no problems)

Drop the dough by rounded tablespoons onto the prepared sheets, at least 2 inches apart. With the palm of your hand, very gently press each cookie down so it forms a very tall disk shape. Do not press too hard and do not press it flat.

Sprinkle the tops of the cookies with granulated sugar (I eliminated this step) and bake for 10 to 12 minutes, rotating the pan halfway through the baking time (I didn't do this either), until the tops of the cookies just begin to brown.

Remove the pan from the oven and cool on a wire rack for 5 minutes. Use a spatula to transfer the individual cookies to the rack to cool completely (Ashley of "eat me, delicious" said "although they are delicious warm" and I completely agree: I always prefer freshly baked cookies).

Monday, February 14, 2011

Über Super Ultra Lemony Lemon Bars

First, Happy Valentine's Day!
To celebrate Valentine's Day, and the inherently tart-sweet nature of relationships, I set out to make my boyfriend's favorite dessert: lemon bars. Lemon bars are amongst the most delicious desserts, and everyone I've ever offered one to has declared that these ones in particular are amazing.

Disclaimer: I love sour. I drank about a half a cup of straight, fresh squeezed, leftover lemon juice while I was making these lemon bars. As for the recipe, I squeezed about six lemons for these desserts (you probably need only three if you follow the recipe exactly), and added way more lemon zest, limoncello, and lemon juice that the recipe requires. This dish, taken from Emeril Lagasse, is already entitled "Super Lemony Lemon Squares", but given the way I’ve altered it the more fitting title should probably be “Ultra Super Lemony Lemon Squares”. If you didn’t like warheads as a kid and if you don’t crave ascorbic acid in the morning, then I’d stick to your angel food cake. However, in the spirit of balance, and knowing that I was cooking for people other than myself, I made these bars more lemony than the recipe, but not quite as lemony as I would have if I was cooking for just Profe and I.

Sadly, Profe and I couldn't cook together this week. I went on a trip to investigate potential graduate programs and am having quite a chilly sojourn with some friends. So, to give us all a little energy to brave the cold (it's eleven degrees Farenheit right now), I decided to make lemon bars for Valentine's Day. Profe did, however, give me his blessing to make lemon bars, because both his and lemons’ ancestors are originally from Asia. And, when you sprinkle the powdered sugar over the lemon bars at the end, they both have spots :) .

Here’s the recipe:

Ingredients

12 tablespoons (1 1/2 sticks), plus 1 tablespoon cold unsalted butter
  • 1 3/4 cups plus 3 tablespoons all-purpose flour
  • 2/3 cup confectioners' sugar, plus more for garnish
  • 1/4 cup cornstarch
  • 3/4 teaspoon salt plus a pinch
  • 4 eggs, lightly beaten
  • 1 1/3 cups granulated sugar
I only used one cup of organic granulated sugar
  • 1 1/2 teaspoons lemon zest
I used 1 1/2 tablespoons lemon zest
  • 2/3 cup fresh lemon juice, strained
I used 1 cup of lemon juice
  • 1/4 cup whole milk
  • 2 tablespoons limoncello, or other lemon-flavored liqueur, optional
I used 3 tablespoons

Note: if you follow the recipe exactly how I made it then your lemon bars will come out a little more gooey than Emeril's. To compensate for this you could use the entirety of the crust (once prepared I only use about half) or you could use xanthan gum, arrowroot, egg, or any thickening agent. Be careful, though: using thickening agents requires a little extra love and care.

Directions

Lightly butter a 9 by 13-inch baking dish with 2 teaspoons of the butter and line with 1 sheet of parchment or waxed paper. Butter the top of this sheet of paper with 1 teaspoon of the remaining butter and then lay a second sheet of parchment or waxed paper crosswise over the first sheet. The parchment should be cut large enough so that the sides are even with the top of the baking dish; this extra paper will function as handles to help you remove the lemon squares from the pan later. Set pan aside.

In a large bowl combine 1 3/4 cups of the flour, 2/3 cup of
the confectioners' sugar, the cornstarch, and 3/4 teaspoon of the salt and mix thoroughly. Cut the remaining 12 tablespoons of butter into small pieces and add to the flour mixture. Using your hands, 2 forks, or a pastry blender, work the butter into the flour mixture until the mixture resembles coarse meal. Transfer the butter-flour mixture to the prepared baking dish and press into an even 1/4-inch layer along the bottom and partly up the sides of the pan. Refrigerate for 30 minutes.

While the crust is chilling, preheat the oven to 350 degrees F.

Bake the crust until golden brown, about 20 to 25 minutes.

While the crust is baking, assemble the filling by combining the eggs, granulated sugar, flour, and lemon zest in a medium bowl and whisking until smooth. Stir in lemon juice, milk, limoncello, and remaining pinch of salt and mix well.

When the crust is golden brown, remove it from the oven and reduce the oven temperature to 325 degrees F. Stir the lemon mixture again, then pour onto the warm crust. Bake until the filling is set, about 20 minutes. Transfer to a wire rack to cool completely. Grasp the waxed paper that lines the 2 longest sides of the baking dish and remove the bars from the pan by pulling up gently. The entire dessert should easily dislodge and come away from the pan. Transfer to a cutting board and, using a clean knife, cut into squares, wiping knife after each cut. Place a small amount of confectioners' sugar into a small si
eve, and sprinkle the bars with the sugar. Serve immediately, or refrigerate, wrapped with plastic wrap, up to 2 days, until ready to serve. I garnished them with sliced heart-shaped strawberries.

Sunday, February 6, 2011

Baklava

Having blown through cookies, cheesecake, and brownies influenced by Profe, I needed something fresh and new to bake. Looking for inspiration, I pensively stroked Profe's fur, and admired the warm golden glow of his coat between his dark spots and stripes, laughing silently and lovingly at his ludicrous and almost maniacal expression. Suddenly, the idea came to me from his layers, color, and the mischievous shape of his eyes in that moment: baklava.

Hailing from the former Ottoman empire, and keeping with our South Asian theme, baklava is a dessert with an interesting texture that I think is partly an acquired taste. To illustrate this point, allow me to provide you with a conversation that took place ten minutes ago:

"Would you like some Baklava?!" I ask my brother as he walks in the front door.

"Is it good?" he asks.

"Try it for yourself. My taste buds are not your taste buds."

"I'll take this small piece-- I'm normally not such a huge fan of Baklava," he says as he reluctantly cuts one of the smaller pieces away from the baking dish. "It's actually pretty good," he says after several moments pass. "I like it more than I normally like Baklava."


To some extent I agree with him: baklava is incredibly rich, but on top of that it's made of flaky crust has a syrupy sauce that sinks to the bottom. I've had some horrendous baklava during my twenty-three years of life. It can be papery or soggy and overly sweet. Also, if chopped nuts as a texture bother you, then steer clear of this recipe.

That being said, baklava can be a wonderful dessert when prepared carefully and eaten by an enthusiastic audience. I'd never made anything with phyllo dough until last night and the prospect made me nervous, but I needed something that would keep without refrigeration, so that I could travel to school and share the dessert. I searched the internet for a recipe infused with spice and came up with this gem.


Ingredients

For the filling:
1 (5-inch piece) cinnamon stick, broken into 2 to 3 pieces or 2 teaspoons ground
15 to 20 whole allspice berries
6 ounces blanched almonds
6 ounces raw or roasted walnuts
6 ounces raw or roasted pistachio
2/3 cup sugar
(I left this out)
1/4 cup water
1 teaspoon rose water
(I left this out)
1 pound phyllo dough, thawed
(You will not need the whole pound)
8 ounces clarified unsalted butter, melted

For the syrup:
1 1/4 cups honey
1 1/4 cups water
1 1/4 cups sugar
1 cinnamon stick
1 (2-inch) piece fresh orange peel
(I used almost an entire orange peel and ended up using only half the syrup over the dessert)


Directions

Heat the oven to 350 degrees F.

Place the cinnamon stick and whole allspice into a spice grinder and grind.

Place the almonds, walnuts, pistachios, sugar and freshly ground spices into the bowl of a food processor and pulse until finely chopped, but not pasty or powdery, approximately 15 quick pulses. Set aside.

Combine the water and rose water in a small spritz bottle and set aside.

Trim the sheets of phyllo to fit the bottom of a 13 by 9 by 2-inch metal pan. Brush the bottom and sides of the pan with butter; lay down a sheet of phyllo and brush with butter. Repeat this step 9 more times for a total of 10 sheets of phyllo. Top with 1/3 of the nut mixture and spread thinly. Spritz thoroughly with the rose water. Layer 6 more sheets of phyllo with butter in between each of them, followed by another third of the nuts and spritz with rose water. Repeat with another 6 sheets of phyllo, butter, remaining nuts, and rose water. Top with 8 sheets of phyllo brushing with butter in between each sheet. Brush the top generously with butter. Place in the oven and bake for 30 minutes. Remove pan from the oven and cut into 28 squares. Return pan to the oven and continue to bake for another 30 minutes. Remove pan from the oven, place on a cooling rack, and cool for 2 hours before adding the syrup.

Make the syrup during the last 30 minutes of cooling. Combine the honey, water, sugar, cinnamon stick and orange peel in a 4-quart saucepan and set over high heat. Stir occasionally until the sugar has dissolved. Once boiling, boil for 10 minutes, stirring occasionally. Remove from the heat and discard the orange peel and cinnamon stick.

After the baklava has cooled for 2 hours, re-cut the entire pan following the same lines as before. Pour the hot syrup evenly over the top of the baklava, allowing it to run into the cuts and around the edges of the pan. Allow the pan to sit, uncovered until completely cool. Cover and store at room temperature for at least 8 hours and up to overnight before serving. Store, covered, at room temperature for up to 5 days.

Monday, January 31, 2011

Firecracker Brownies


My brother graduated early from high school and to celebrate I decided to make him firecracker brownies. The recipe is largely inspired from Chuao Chocolatier who makes a bar named “Spicy Maya” which is essentially the yummiest dark chocolate you’ve ever had coupled with cayenne pepper. To make it even more confusing, Chuao actually makes a bar named “Firecracker” but it’s more of a milk chocolate with pop rocks embedded in it- it’s quite an eating experience, but I prefer complex flavor over bizarre tactile-tongue sensation.


My brother is essentially my taste preference twin. We both slather our burritos in hot sauce, drown pizza in tapatio, spruce up soups with chili garlic sauce, and love the ridiculous in just about everything both food-tastic and beyond. Plus, I’ve made these brownies for him before and he likes them, so I felt fairly comfortable and confident about making brownies with a bang.


I got the stamp of approval from Profe also, because of the following three things:

  1. The name
    • Firecrackers, fireworks and gunpowder were invented in China approximately 2,000 years ago. And, because of the Professor’s not-so-distant heritage, we find a modicum of spice to be quite efficacious.
  2. The spice
    • Probably, my favorite thing about Asian cuisine is you can always crank up the heat. Think: wasabi, chili paste, & curry
    • Actually, scratch that. It's tied …sushi is just about the greatest invention ever.
  3. The color
    • Profe’s spots are a rich chocolately brown. Especially his heart-shaped one.


Special thanks to Epicurious for the baseline for a great recipe!


Happy Monday! Here's the Recipe:


Ingredients:


10 tablespoons (1 1/4 sticks) unsalted butter, cut into 1-inch pieces, plus more for greasing pan

1 cup sugar

3/4 cup natural unsweetened cocoa powder

2 tablespoons vanilla extract

6 tablespoons crushed red pepper

(I used some incredibly hot Bhutanese pepper that I bought at a farmers market in Bumthang, Bhutan last July)

6 tablespoons instant coffee

3 tablespoons cinnamon

2 teaspoons nutmeg

2 large eggs, chilled

1/3 cup plus 1 tablespoon unbleached all purpose flour

1 cup semisweet chocolate chips


Directions:


Position rack in bottom third of oven; preheat to 325°F. Line 8 x 8 x 2-inch metal baking pan with foil, pressing foil firmly against pan sides and leaving 2-inch overhang. Coat foil with butter. Melt butter in medium saucepan over medium heat. Continue cooking until butter stops foaming and browned bits form at bottom of pan, stirring often, about 5 minutes. Remove from heat; immediately add sugar, cocoa, 2 teaspoons water, vanilla, chili pepper, instant coffee, cinnamon, nutmeg, and 1⁄4 teaspoon (generous) salt. Stir to blend. Let cool 5 minutes (mixture will still be hot). Add eggs to hot mixture 1 at a time, beating vigorously to blend after each addition. Add chocolate chips. When mixture looks thick and shiny, add flour and stir until blended. Beat vigorously 60 strokes. Stir in nuts. Transfer batter to prepared pan.

Bake brownies until toothpick inserted into center comes out almost clean (with a few moist crumbs attached), about 25 minutes. Cool in pan on rack. Using foil overhang, lift brownies from pan. Cut into 4 strips. Cut each strip crosswise into 4 brownies.

Monday, January 24, 2011

Ginger Cheesecake


Last week I attempted to make a batch of cookies that resembled Profe. If the cookies failed in capturing the earth-toned, warm, multi-faceted, and playful coloring of my cat, at least they were delicious- devoured by my family in less than forty-eight hours.


Tonight I set out to do something a little different: cheesecake with spices from the home of Profe's ancestors: wild cats from Southeast Asia.


If you open a cookbook featuring Southeast Asian cuisine (for example, Thai, Vietnamese, Indian, etc... ) you're liable to find a wealth of recipes that contain ginger. Hailed for it's medical properties, especially in eastern medicine, ginger seems to be abounding with newly discovered medical benefits. With all of the other members of my family sick with three different illnesses, which I seem to have narrowly escaped, what better way to soothe their minds and bodies than with ginger cheesecake. Now, I know that you’re thinking, “sugary dessert can’t be good for colds, influenza, lost voices, and strep throat”, but I beg to differ. Psychologically, a protein-rich dessert with the delicate balance of spicy, sour, and sweet, may be the key to providing some happiness and relief from the stress of illness.


With the power of ginger and a little bit of lemon on our side, Profe (pictured right) and I were ready to create a new recipe: a dessert to give my family the energy to fight off their mid-January ailments.


Without further adieu, here is a general cheesecake recipe I have perfected over the years with a yummy Southeast Asian twist:


Ginger Cheesecake


1 cup finely crushed Trader Joe’s Ginger Snaps

3 tablespoons butter

3 tablespoons sugar

1 tablespoon fresh ground ginger root

3 packages Philadelphia cream cheese (or 24 oz)

3/4 cup sugar

2 1/2 tablespoons all purpose or pastry flour

3 tablespoons lemon juice

2 tablespoons grated lemon peel (zest)

2 tablespoons fresh ground ginger root

1 1/2 teaspoon vanilla

4 eggs


Crust: mix ginger snap crumbs, 3 tablespoons of sugar, 3 tablespoons butter, and 1 tablespoon of butter. Press against the 9 inch pan. Bake at 325 degrees for 10 minutes.


Filling: mix cream cheese, 3/4 cup sugar, 2 1/2 tablespoons of flour, 3 tablespoons lemon juice, 2 tablespoons zest, 2 tablespoons ginger root, 1 1/2 tablespoons vanilla, and the four eggs.


Bake at 325 degrees for 50 to 55 minutes.

Let pie cool for ten minutes, then refrigerate for four hours.

Happy Baking!


And yes, across the middle are the Himalayas made of crystalized ginger. Yum!


Monday, January 17, 2011

Cookie Monster


Generally, I am not a huge fan of cookies. On top of that, I absolutely abhor nuts in desserts, but these cookies completely changed my mind.

The backstory: I am at my boyfriend's Aunt's house talking about baking during the holidays when Aunt K. mentions that during the holidays she wasn't up to making a fancy dessert, she runs to the other room and retrieves a giant aqua colored tome enscribed with "Zov" in thin green lettering. The word "simply" sits nonchalantly in the "O". Aunt K. opens the book to page 341 to the much raved about recipe entitled "jumble cookies". The titles are all lowercase reminiscent of an e.e. cummings poem. I'm skeptical. There's several kinds of nuts, chocolate, and dried fruit. The combination sounds overwhelming, but Aunt K.'s sister, daughter, and husband all assure me that these are the most delicious cookies they've ever had. She photocopies the recipe and sends me graciously on my way.

About Zov: She's a proprietress of a bistro not so far from my home in California. Her middle-eastern inspired recipes have been called "brilliant"by the Zagat Guide according to the review of another cook book on amazon.com.

So, this evening, I set myself to the task of recreating Zov's recipe as best I could.

Here it is:

Makes 20 cookies

Ingredients:

1 3/4 cups whole almonds
[I used Trader Joe's Dry Roasted and Unsalted Almonds]
1 1/2 cups pecan halves
[I used Trader Joe's Raw Pecan Halves]
2 1/4 cups all-purpose flour
2 teaspoons baking soda
1/2 teaspoon salt

10 ounces (2 1/2 sticks unsalted butter, room temperature)
1 cup grandulated sugar
2/3 cup (packed) brown sugar
2 large eggs, room temperature
1 1/2 teaspoons pure vanilla extract
[I used at least twice as much as this recipe recommended]
1 12-ounce package Hershey's dark chocolate chips
[I used Trader Joe's Semi-Sweet Chocolate Chips]
2 cups raisins
[I used organic raisins from a local health food store]
Parchment paper or nonstick vegetable-oil cooking spray
[I used salted butter- yum!]

Directions:

Position the rack in the center of the oven and preheat the oven to 350 degrees Fahrenheit. Place the almonds and pecans on a heavy, large baking sheet and bake until golden brown and fragrant, about 11 minutes, stirring halfway through the baking time to ensure the almonds brown evenly. [note: unless you have a gargantuan baking sheet, you'll probably have to toast your nuts in waves.] Transfer the nuts to a cutting board to cool completely. Coarsely chop the almodns and pecans, then set the nuts aside. Maintain the oven temperature

Stire the flour, baking soda, and salt in a medium bowl to blend. Set the flour mixture aside. Using a stand mixer with the paddle attachment (or a hand-held mixer), beat the butter sugar and brown sugar in the mixing bowl until well blended, about 3 minutes [it really helps if you can get someone to pour slowly as you beat your ingredients together]. Add the eggs one at at ime, beating well after each addition. Beat in the vanilla. With the machien on low speed, gradually add the flour mixture, beating just until incorporated (do not overmix or the cookies willb e tough). Mix in the chocolate chips, raisins, and then lastly, the chopped nuts [note: I was short on nuts so I supplemented the last cup or so with raw walnuts, first baked in the cookies, from Trader Joe's.

Line 4 heavy, large baking sheets with parchment [again, I used butter between batches] or spray the baking sheets with nonstick cooking spray. Using 1/2 cup of dough for each cookie, mound the dough atop the prepared baking sheets, spacing evenly and forming 5 mounds on each baking sheet. With the palm of your hand lightly press down the cookie dough to flatten. Working in batches bake the cookies until they are golden brown all over and the very center is still pale golden, about 15 minutes. Cool the cookies on the baking sheet for 5 minutes. Transfer the cookies to a rack and cool completely.

I hope these cookies are as much of a hit in your household as they were in mine!